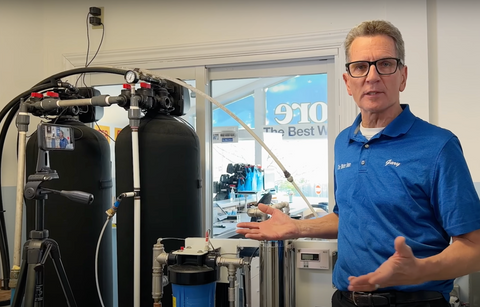
At Water eStore, we're all about making water filtration easy and helping you tackle pesky water problems for your family. I'm Gary the Water Guy, and today I've got some pro tips and tricks to share with you on maintaining your whole house reverse osmosis system. Specifically, we'll be talking about replacing the prefilter and membrane in our trusty Vectamaxx RSL 4800 system.
As someone who's been in the water filtration game for a while, I know how important it is to keep your reverse osmosis system running smoothly. So come join me as I walk you through the process step by step!
WHEN TO CHANGE YOUR RO FILTERS & MEMBRANES

We keep track of the TDS coming from our Vectamaxx RSL 4800 by testing the water a few days a week. Lately, we’ve seen the TDS rising and all of a sudden the production has fallen off — so I know it’s time to change the membranes and pre-filter! We recommend you change the pre-filter monthly as a preventative maintenance tip.
The RO system membranes were changed about 3 years ago but yours might need replacement more or less often, depending on how much water you use and the quality of your raw water.
IMPORTANT - BEFORE YOU BEGIN
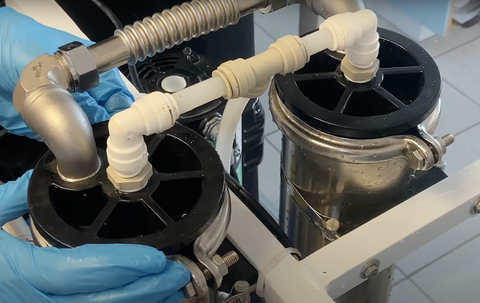
Please remember that Rubber/Nitrile gloves must be used when performing RO system maintenance to prevent microbial contamination.
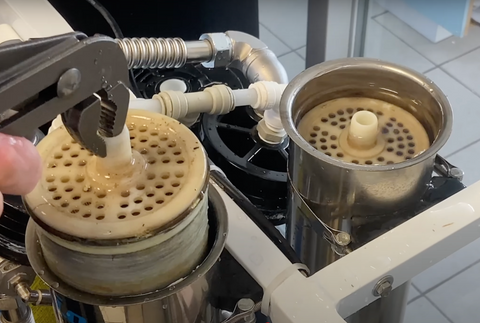
How to Perform an RO Pre-Filter Replacement
FREQUENCY: Monthly
-
Turn OFF the system's power as a safety precaution.

- Shut OFF the water supply to the unit.
- Depressurize filter housing by pressing red purge button.
- Remove the filter housing by turning it counterclockwise with the housing wrench supplied.
- Remove used filter from housing. Inspect inside of housing for sediment / scale. Clean and rinse.
- Dry thoroughly with clean, lint free cloth.
- Inspect O-ring for damage and verify it is sealed correctly.
- Remove all plastic wrapping from filter cartridge. Insert the new filter in the housing and reassemble. * DO NOT OVERTIGHTEN. 1/4 turn after hand tight using the supplied filter wrench. >> BUY REPLACEMENT FILTER HERE
- Turn ON water supply.
- Purge the air from the filter housing by depressing the red purge button until water comes out. TIP: place towel over purge button to catch escaping water.
- Turn ON power — or, if replacing the membrane too, see below starting at 3.
How to Perform Membrane Replacement
FREQUENCY: When Needed
-
Turn OFF the system's power as a safety precaution.
- Shut OFF the water supply to the unit, verify operating pressure gauge is reading O PSI.
- Loosen bolts and slide top end cap clamp down housing out of the way. Repeating on all remaining membrane housings.
- Firmly grasp housing end caps and using a rocking motion, remove them from the housings
- Lay the housing and cap assembly to the side and remove membrane by lifting it from the housing. Pliers may be necessary to grasp the membrane if it has been installed for an extended period of time.
- Keep track of which end is up when removing the membranes.
- Insert the new membrane element into the housing, so that the brine seal of the membrane will seat at the inlet side of the membrane housing (this is indicated by the direction of flow label on the housing). >> BUY REPLACEMENT MEMBRANE HERE
- Gently push and slowly twist the membrane until the product adapter fully seats inside the housing cap still in place at the bottom of the housing.
-
Repeat steps 8-10 for remaining membranes.
- Inspect housing end cap O-rings for damage and to make sure they are seated correctly.
- Re-install the housing end cap assembly into housings using rocking motion.
- Re-install the band clamp and snug bolts equally to maintain an even gap between the clamp halves.
- Repeat steps 6-B on any remaining housing end cap assemblies.
- Turn ON water supply.
- Turn ON power.
- Perform system start-up and check for leaks.
- Be sure to open the recycle valve.
- Press the on button for 2 seconds to start the system.
- Once the pump is running and air has been purged, close the reject valve until you have a flow rate of 5 gpm, let the system operate for about 5 minutes with the recycle valve fully open.
- Slowly close the reject valve until reject flow is about 3 gpm.
- Slowly close the recycle valve until you get the correct system pressure for your system of 130 psi for 2400 and 4800 models or 140 psi for 7200 and 9600 models.
- Adjust both valves until you get about a 2:3 ratio of reject flow to product flow without exceeding maximum system pressure.
Membranes are shipped with an anti-bacterial preservative inside them. Operate the system for one hour with the product water going to the drain to flush the preservative out before using the product water.
There you have it! Thank you for joining me on this journey to demystify whole house reverse osmosis maintenance. I hope that the insights and tips I've shared have empowered you to take control of your water quality. Remember, maintaining your reverse osmosis system is essential for ensuring clean and healthy water for you and your family. If you have any questions or need further guidance, don't hesitate to reach out. At Water eStore, we're here to support you in conquering your water challenges.
>> But wait... you need to know how these systems work, right? Check this video out!

>> Shop Replacement Replacement Pre Filter
>> Shop Replacement Membrane


